


A Snowflake Pillow tutorial!
Hi! Welcome to the last day of the 12 Days of Christmas in July blog hop, hosted by Confessions of a Fabric Addict, and my blog, Christina's Handicrafts. I'm Christina! Thank you to Sarah for putting this together. I hope you have followed along with everyone, and seen all of the fun goodies, treats and fun projects we have all shared. Sarah's quilt is saved for my to-do list before Christmas 2020, as it is gorgeous!
Today I am sharing with you on how to make a machine appliqué snowflake pillow. It was my first time doing machine appliqué and it was fun, easy and no fingers were pricked in the making!

Supplies:
17" square of background fabric
15" square for snowflake
Fabric for backing (I followed Crazy Mom Quilts' envelope pillow backing)
15" square fusible (I used the Heat and Bond off of the bolt)
17" square of batting
17" square of muslim or simple white fabric for the back of the front sandwich
Basting Spray
Once everything is cut, iron the fusible onto the 15" square for the snowflake. Now cut out your snowflake. You can use your imagination. I used Google and typed in "Snowflake Cut Patterns" and switched to pictures and picked one that I liked.
HINT: The more complicated and intricate the pattern, the more start and stops you will have, and the harder it could be to sew down.
HINT 2: If you fold your square into 8ths, that is a lot of layers. Take the back paper off of the fusible, however do not fold it in on itself. It will start to stick, especially in warm climates (do not ask me how I know this). This hint will cut a full layer out. Also, use your heavy duty sewing scissors, do not use your small thread trimming ones either.
Once you are satisfied with your snowflake, center or put however you would like it on your pillow and iron it down. Now, if you did not plan to wash it, have kids, adults, or animals lay on it, you could skip the next step. But, because this pillow will be used in my house, I did the next step. Plus it was my first time for raw edge machine appliqué, and will not be my last.

Now before we get to the machine appliqué part, make sure to layer it, using the basting spray and making sure that all layers are flat.

Choose your color of choice for the snowflake, and white as your bobbin thread, and stitch around each raw edge on your snowflake. I did a straight stitch, some people do a zig-zag stitch. Use whatever you prefer, based on the the look you are going for.

Once all raw edges are stitched down square up your pillow top to 16.5" square.
Now to get that envelope backing that I think looks oh so nice, and does not require a zipper, please use the tutorial here from Crazy Mom Quilts. Come back to this blog once you have finished, as there is something cool below.

Congrats! You have made a wonderful snowflake pillow. You can make them in difference sizes, or make another, because who can stop at one?

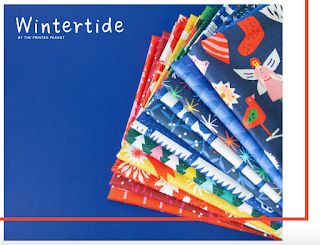
Now, the surprise! We have a wonderful sponsor for the whole blog hop. The sponsor is Figo Fabrics, and they have offered a fat quarter bundle of their new Christmas line, called Wintertide!

Choose your color of choice for the snowflake, and white as your bobbin thread, and stitch around each raw edge on your snowflake. I did a straight stitch, some people do a zig-zag stitch. Use whatever you prefer, based on the the look you are going for.

Once all raw edges are stitched down square up your pillow top to 16.5" square.
Now to get that envelope backing that I think looks oh so nice, and does not require a zipper, please use the tutorial here from Crazy Mom Quilts. Come back to this blog once you have finished, as there is something cool below.

Congrats! You have made a wonderful snowflake pillow. You can make them in difference sizes, or make another, because who can stop at one?

Now, the surprise! We have a wonderful sponsor for the whole blog hop. The sponsor is Figo Fabrics, and they have offered a fat quarter bundle of their new Christmas line, called Wintertide!

Isn't the fabric just wonderful! The first piece reminds me of homemade ornaments, perfect for hanging on the tree. ***Give away is now closed*** Below is an entry form for your opportunity to win this fat quarter bundle. All entries need to be received no later than Tuesday, July 30, and the winner will be announced on Sarah's blog on Wednesday July 31.
Do not for get to hit submit. This part is very important!
Visit all of the other blogs on this blog hop and enter to win, if you have not done already, and of course give support and love to each and every one of them.
SUNDAY, JULY 14TH
MONDAY, JULY 15TH
TUESDAY, JULY 16TH
WEDNESDAY, JULY 17TH
THURSDAY, JULY 18TH
FRIDAY, JULY 19TH
SATURDAY, JULY 20TH
SUNDAY, JULY 21ST
MONDAY, JULY 22ND
TUESDAY, JULY 23RD
WEDNESDAY, JULY 24TH
THURSDAY, JULY 25TH
Christina @ Christina’s Handicrafts (You are Here!!!)
Thank you for joining us on this wonderful blog hop, hosted by Sarah at Confessions of a Fabric Addict.
Until next year!
-Christina
Thanks so much for the great tutorial!
ReplyDeleteThis takes me back to my childhood of making paper snowflakes. I think I might have to make some fabric ones! Thanks for the inspiration.
ReplyDeleteGreat tutorial! I'll be Googling those patterns. Love the long pillow in the picture, too.
ReplyDeleteSuper cute! I had an idea this might be your project from your sneak peek!
ReplyDeleteWhat a fun way to make a snowflake-reminds me of the ones we used to make a long time ago in school! Thanks for sharing!
ReplyDeleteHi Christina! What a great tutorial you have shared today. I love how instructions and especially the fabric you chose! ~smile~ Roseanne
ReplyDeleteWhat a cute idea. My grandsons like to make me paper snowflakes at Christmas for my windows and this would be an awesome project for them to do!! Thanks for the inspiration!
ReplyDeleteLove your pillow. I recently bought a new sewing machine and have not tried to do machine applique yet but your project has inspired me! Thank you for sharing.
ReplyDeleteWhat a great tutorial, Christina! I experimented one year with cutting paper snowflakes - there are lots of great designs on the internet - and can see that those skills I learned would be perfect for this! Can't wait to give it a try. Thanks for all your hard work!
ReplyDeleteGreat to know no fingers were pricked in the making! This project made me think how much fun it would be to make paper snowflakes with grandkids (or kids!) and then re-create their designs to make them a special pillow.
ReplyDeleteYour snowflake pillows turned out so cute!! Thanks for the creative idea, and the tutorial!
ReplyDeletebeautiful snowflake pillows, thanks sew much for directions.
ReplyDeleteMerry Christmas🎄⛄🎄
I love pillows. Thanks for the tutorial.
ReplyDeletethanks for sharing how to make the lovely snowflake pillows.
ReplyDeleteThank you for sharing. I think I will be making a few. The envelope closure is my favorite.
ReplyDeleteReally nice pillow design, and I love pillows. Thank you for the tutorial.
ReplyDeleteLove your pillows.. thank you for sharing Tutorial too :)
ReplyDeleteThanks for the tutorial and a great idea!
ReplyDeleteYou made machine applique look SEW easy!!
ReplyDeleteWhat a beautiful pillow. Thanks for the mini tutorial and all of the hints ;}
ReplyDeleteThis would be a fun project to share with the grandkids - they cut their own snowflake pattern and help them stitch it. (or stitch it for them)
ReplyDeleteCute pillow and so easy to make just in time for the holidays!
ReplyDeleteVery cool!! What a great gift this would make for someone! And of course I'd need one myself... hmmm... better get to it! xx
ReplyDeleteGreat pillow, thank you for the tutorial!
ReplyDeleteA wonderful pillow and a very helpful tutorial to make it. I like the other one you made, too. Thank you!
ReplyDelete